By Josh Burns
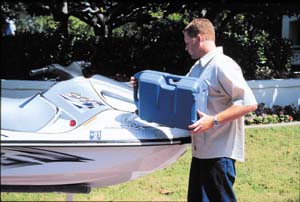
With winter almost here, those of you who don't live in Florida or Southern California are preparing to put your watercraft away for the season. In many states, where the water temperature hits freezing, only a few hard-core enthusiasts will throw on their dry suits and ride during the winter months. But for the average watercraft enthusiast, the season is basically over. And if you don’t want to have to purchase a bunch of new equipment when the season comes around again next year, then you’ll want to take some steps to properly store your craft for the winter. Here’s what we recommend you do to your craft before putting it away for the winter.
 Step 1
Although this might sound a little backward, the first thing we recommend
you do when preparing your watercraft for winter storage is top off the
fuel tank. By topping off the fuel tank, you will prevent condensation
from forming in the tank. Once you’ve topped off the tank, add some fuel
stabilizer to the gas. This will prevent the gas from going bad over the
winter. Sta-Bil fuel stabilizer, which is available from most watercraft
dealers, work well.
 Step 2
In areas where the temperatures drop below freezing, it is a good idea to
add some antifreeze to your watercraft’s cooling system. This will
prevent any water that may be left in the system from freezing and
expanding, which can cause severe damage. However, because some
antifreezes can be damaging to aluminum and gaskets over a prolonged
period, it is important to use an antifreeze that is formulated to be used
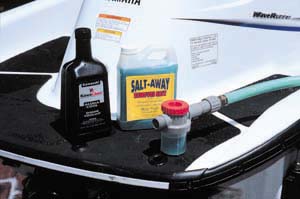
with aluminum engine components. Before flushing your system with
antifreeze, however, we recommend you first flush the system with an
engine flush and protectant, such as Salt-Away. This will remove any
mineral deposits that may be in your craft’s engine, while also leaving
a protective film over your engine’s metal surfaces. There are two ways
that you can get the antifreeze into your cooling system: First, you can
disconnect your cooling lines at different points and pore it into them;
second, you can use the flush adapter that comes with the Salt-Away and
flush the antifreeze through the system. Because you have to run your
engine to flush your craft, this step will also allow the fuel stabilizer
that you added to your gas in Step 1 to reach the carburetors. This will
prevent any fuel within the carburetors from becoming gummy and possibly
clogging the fuel system when you fire up the craft next spring.
 Step 3
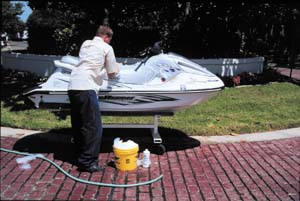
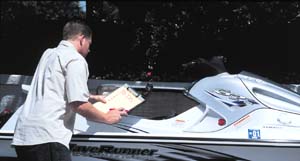
Give your craft one last wash (both inside and out) before putting it
away. You should use either car-wash soap or a liquid dish detergent for
the washing. While washing the inside of your craft, you'll want to be
sure to cover the intake system with a plastic bag to prevent any water
from possibly entering the engine. Once you’re through washing your
craft, thoroughly dry it both inside and out. You’ll want to be
absolutely certain to get all of the water out of the hull.
 Step 4
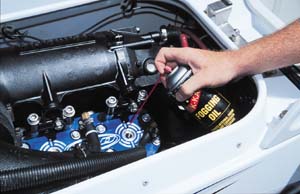
Besides lubricating, many lubricants will prevent corrosion and repel
moisture. Fogging oil is such a lubricant. Start your craft’s engine one
last time, but only for a few seconds. While the engine is idling, spray
some fogging oil into the throat of the carburetors. Some watercraft have
an access hole in the flame arrestor that permits you to do this. Those
that don’t may require the removal of part of the flame arrestor if you
cannot access the throat of the carburetors. Once you’ve done this, blip
the throttle one last time to remove any excess water from the craft’s
cooling system and then turn off the engine. Next, disconnect the
spark-plug wires from the spark plugs and remove the spark plugs. When you
disconnect the plug wires, you need to be sure to ground them. Next, spray
some fogging oil into each cylinder and then bump the starter, just for a
second. This will allow the engine to turn over, but not start. (Note:
You’ll want to be sure to hold a rag over the spark-plug holes at this
time to prevent making a big mess.) Spraying fogging oil into the
spark-plug hole and bumping the starter will allow the lubricant to coat
the cylinder walls and internal engine components. If you don’t have any
fogging oil, a small amount of two-stroke engine oil, such as the one that
you actually run in your craft, works well, too. Once you’ve lubed the
engine’s internals, reinstall the spark plugs.
 Step 5
Now that you’ve cleaned and dried your boat and lubricated the engine
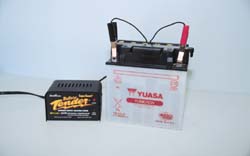
internally, it’s a good time to disconnect and remove the battery.
You’ll want to do this so that you don’t have to purchase a new one
next spring. Once you disconnect your battery (remember to disconnect the
negative [ground] terminal first, then disconnect the positive terminal),
pull it out and place it on a rubber mat, either in a storage shed or in
your garage. The reason that you do not want to store the battery in your
house is because when they are being charged, batteries let off dangerous
fumes. And the reason you’ll want to put the battery on a rubber mat and
not on a concrete floor is because this can actually discharge the
battery.
If you don’t already have a trickle charger, we suggest that you invest in one now. A trickle charger will maintain your battery’s charge over the winter and prevent you from having to buy a new battery come spring. The Battery Tender from Deltran Corporation works well, because it will automatically maintain your battery’s charge throughout the months of hibernation without the risk of overcharging and damaging it. Click here for more information from Yuasa Batteries.
 Step 6
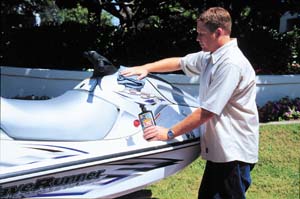
This step isn’t absolutely necessary, but if you value your craft, then
we recommend putting a coat of wax on its exterior now. This will protect
its finish.
 Step 7
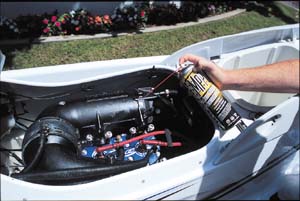
After you’ve waxed your craft, spray down the exterior of the engine and
all of the craft’s metal components (including the jet pump, latches and
cables) with a multipurpose lube. This will provide protection against
corrosion. A rust inhibitor/moisture displacer such as Maxima’s MPPL
(Multi-Purpose Penetrating Lube) works great for doing this. Once you
spray down the metal parts, use a rag to wipe off any excess lubricant;
all it takes is a thin film of lube to protect the metal surfaces.
 Step 8
Okay, now that your craft is cleaned and prepped for storage, get out a
sheet of paper and a pen. Make a list of any problems the craft has.
Inspect the hull for any cracks. Inspect the fuel and water lines. If they
are hard and brittle, you’ll want to make a note that they will need to
be replaced in the spring before you ride your craft. Also, check for
loose or broken motor mounts, or any other items that may need to be
replaced before you hit the water next year. Now is also a good time to
check the torque of all your craft’s fasteners (nuts, bolts and hose
clamps).
 Step 9
Unlatch the hood and/or seat of your craft and prop it open slightly. A
small wooden or rubber block is ideal for doing this. By propping open the
hood and/or seat, you allow air to circulate throughout the craft’s
engine compartment (hull). This will prevent any moisture from being
trapped within the craft.
 Step 10
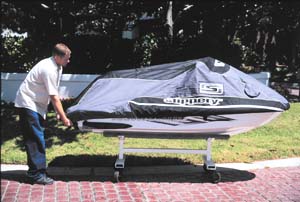
Break out your craft’s cover to protect it from the elements. If you
don’t have a cover, then we strongly suggest you buy one. In addition to
covering your craft, you might also want to stick a rag into the exhaust
outlet. This will prevent any small animals from making your ski their
winter home. For this same reason, be sure that the drain plugs are
installed (but not tightly) in your hull as well. It is a good idea to put
a dab of grease on the drain plug’s O-rings before installing them.
Also, don’t forget to tighten the plugs before that first ride next
spring.
By following these 10 simple steps, come next spring your craft should be ready to ride in only a few minutes...